Making espresso at home can feel like a luxury, but it’s much more accessible than many people think. You do not need to visit a coffee shop every day to enjoy a perfect shot of espresso. With the right tools, good beans, and proper technique, you can create café-quality espresso in your own kitchen.
This guide will show you everything you need to know, from choosing equipment to troubleshooting common issues. If you want rich, strong coffee with crema on top, keep reading. By the end, you’ll have the confidence and skills to how to make espresso at home at home, just like a barista.
What Is Espresso?
Espresso is a concentrated coffee drink that’s brewed by forcing hot water under high pressure through finely-ground coffee. The result is a small, intense shot with a layer of crema -the golden, foamy top that sits above the liquid. Espresso serves as the base for many drinks like cappuccinos, lattes, and macchiatos.
The defining features of espresso are:
- Strong flavor and aroma
- Thick texture with crema
- Small serving size (usually 25 -35ml per shot)
Unlike drip coffee, espresso has a unique taste and mouthfeel that many coffee lovers crave. The crema is not just for looks; it carries aroma and adds a smooth, creamy mouthfeel. When you drink an espresso, you’re experiencing a balance of acidity, sweetness, and a pleasant bitterness, all concentrated into a few sips.
The process of making espresso is different from other brewing methods. Regular brewed coffee relies on gravity, but espresso uses pressure -usually around 9 bars (nine times the normal air pressure at sea level) -to extract flavors quickly. This high pressure is what creates the crema and the intense, syrupy texture.
Because of this, espresso also highlights flaws in beans or technique more than other brewing methods. It’s why baristas often say that “espresso doesn’t lie. ”
Why Espresso Is Special
Espresso’s concentrated nature means that every aspect -beans, grind, water, temperature, and even the cup -matters. Because of its strength and texture, espresso is both a finished drink and a building block for many popular beverages. In Italy, it’s often enjoyed in a single gulp while standing at the bar.
Elsewhere, it forms the heart of coffee culture explained, from the busy café to your quiet kitchen.
Understanding The Basics: What You Need
Before you can make espresso at home, you need to gather the right tools. Here are the essentials:
- Espresso machine (manual, semi-automatic, or automatic)
- Coffee grinder (preferably burr, not blade)
- Fresh coffee beans (espresso roast recommended)
- Tamper for pressing the grounds evenly
- Scale for precise measurement
- Filtered water for best taste
- Cup (demitasse or small espresso cup)
Some extras can make the process smoother, such as a milk frother, knock box for used grounds, and a thermometer. However, the above list covers the basics.
Each tool plays a unique role:
- The espresso machine creates the pressure needed to extract espresso.
- The grinder determines the consistency and size of the coffee grounds.
- The tamper helps compress the coffee, making sure water flows through evenly.
- The scale ensures you always use the right amount of coffee and water, making your results repeatable.
- Filtered water is key because tap water can carry minerals or chemicals that affect taste or damage your machine.
Espresso Machine Types
Choosing the right machine is your first big decision. Here’s a comparison of common home espresso machines:
| Type | Control | Skill Required | Price Range (USD) | Best For |
|---|---|---|---|---|
| Manual (Lever) | Full manual | High | 200 -1,500+ | Enthusiasts |
| Semi-automatic | Manual start/stop | Medium | 150 -1,000 | Home baristas |
| Automatic | Programmable | Low-Medium | 300 -2,000+ | Convenience seekers |
| Pod-based (Capsule) | Fully automatic | Low | 50 -500 | Speed & simplicity |
Manual machines give you full control but require practice to master. Semi-automatic and automatic machines make the process more repeatable. Pod machines are fast and clean but offer less customization and typically lower quality espresso.
Non-obvious insight: Many beginners choose pod machines for simplicity, but a semi-automatic machine gives you much more control and better espresso flavor. Over time, you may find that the ritual and learning curve with manual or semi-automatic machines are part of the joy.
Grinder Importance
A good grinder is often more important than an expensive machine. Burr grinders provide even, consistent grounds, while blade grinders produce uneven sizes that can ruin your shot.
With espresso, the grind size affects how quickly water passes through the coffee. If your grind is inconsistent, some parts of the puck will over-extract (bitter) and some will under-extract (sour or weak). Investing in a quality grinder, even an entry-level burr grinder, makes a bigger difference than upgrading your espresso machine.
Non-obvious insight: Static electricity can cause grounds to scatter when grinding. A simple trick is to add a drop of water to the beans before grinding (known as the “Ross Droplet Technique”). This reduces static and mess.
Choosing The Best Coffee Beans
The beans you use shape the flavor, aroma, and crema of your espresso. Not all coffee beans are equal, especially for espresso.
Espresso Roast Vs. Regular Coffee Beans
Espresso beans are usually roasted darker, which brings out rich, chocolatey notes and reduces acidity. That said, you can use medium or even light roasts for a brighter, more acidic shot.
Lighter roasts highlight fruity or floral notes, while dark roasts bring bitterness and caramel. Many Italian espressos are medium-dark, but specialty coffee drinkers may prefer lighter roasts. Experiment to find your favorite.
A practical tip: If you notice your espresso is sour with a light roast, try increasing extraction time or raising the temperature slightly.
Freshness Matters
Buy freshly roasted beans and use them within 2 -4 weeks. Beans start to lose flavor soon after roasting. If you can, buy from a local roaster and check the roast date.
Supermarket beans often sit on shelves for months and lose their aroma. If you don’t have a local roaster, look for roasters who ship directly to you and print the roast date on the package.
Non-obvious insight: If you notice “oily” beans, they are likely very dark-roasted or old. Oil on the surface is normal for some dark roasts, but too much can clog grinders and affect flavor.
Grind Size
Espresso requires a fine grind, similar to table salt. If the grind is too coarse, water will flow too fast and the shot will be weak. If it’s too fine, water will struggle to pass, causing over-extraction and bitterness.
Some grinders have a special “espresso” setting, but you may need to experiment to find the perfect size for your machine and beans.
Storage Tips
Store beans in a cool, dark, airtight container. Avoid the fridge or freezer, as moisture can spoil the beans.
Light, heat, and air speed up staling. Ceramic or stainless steel containers with a one-way valve are best. If you buy in bulk, divide your beans into small batches and keep most sealed until you’re ready to use them.
Non-obvious insight: Single-origin beans can make unique espressos, but blends often produce more balanced, reliable results for beginners. As you gain experience, try both and see how different origins affect taste.
Water Quality And Temperature
Water is 90 -95% of espresso, so its quality is critical. Use filtered water without strong flavors or odors.
- Ideal water temperature: 90 -96°C (194 -205°F)
- Hard water can cause scale build-up in your machine and affect taste.
- Soft water can lack minerals, making espresso taste flat.
If your water tastes bad from the tap, it won’t make good coffee. Bottled spring water or filtered tap water usually works well. Some coffee enthusiasts use mineral packets to adjust their water for the best taste and machine health.
Some machines let you control temperature. If yours does, experiment to find the sweet spot for your beans. Higher temps extract more, but can increase bitterness; lower temps highlight acidity and sweetness.
Non-obvious insight: Water that is too pure (like distilled) may not extract enough flavor because minerals help dissolve coffee compounds. Aim for balanced mineral content, not extremes.
Step-by-step Guide: Making Espresso At Home
Now, let’s get practical. Here is a step-by-step process for brewing a classic espresso shot at home.
1. Warm Up Your Equipment
Turn on your espresso machine and let it heat up for at least 15 -30 minutes. This ensures the water, portafilter, and cup are all at the right temperature. A cold portafilter or cup will cool your espresso and reduce crema.
For best results, run a blank shot (just water, no coffee) through the group head and into your cup. This heats everything up and removes any old coffee oils from the last use.
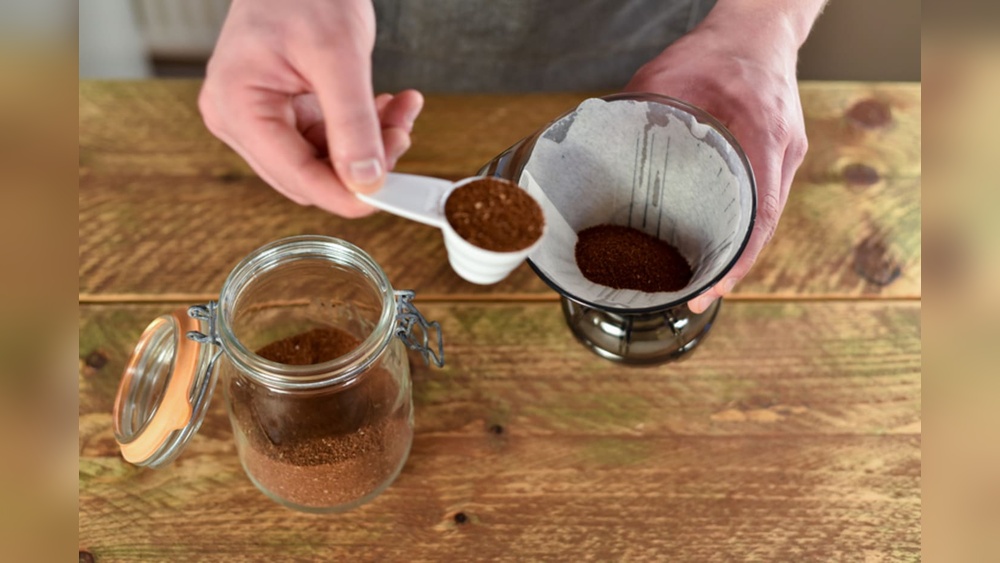
2. Measure And Grind Your Beans
Weigh out 18 -20 grams of beans for a double shot (common size). Grind them finely, aiming for a texture similar to fine sand or table salt. The right amount can vary, so check your machine’s recommendations.
If you’re making a single shot, use about 8 -10 grams. Always grind just before brewing -pre-ground coffee loses flavor quickly.
3. Dose And Distribute
Pour the ground coffee into the portafilter basket. Tap it gently to settle, then use your finger or a distribution tool to spread the grounds evenly. This step prevents channeling, where water finds easy paths and extracts unevenly.
Some baristas use a toothpick or tool to stir the grounds in the basket (the “Weiss Distribution Technique”) for even better results.
4. Tamp Evenly
Press down firmly and evenly with your tamper. Apply about 30 pounds (13.6 kg) of pressure, enough to compress the grounds into a firm, level puck. Uneven tamping will cause weak or bitter shots.
Twist the tamper slightly at the end to polish the surface. The goal is a flat, compact puck that resists water but allows even flow.
5. Lock And Brew
Insert the portafilter into the machine’s group head and lock it in place. Start the shot immediately.
- Extraction time: 25 -35 seconds
- Yield: 36 -40 ml for a double shot
Watch the espresso as it pours. The first drops should be dark, turning golden with crema forming on top.
If your machine has a pressure gauge, aim for around 9 bars during extraction. Too low or too high can indicate grind or tamp issues.
6. Serve Immediately
Espresso is best enjoyed fresh. Serve in a pre-warmed cup. If you like, add sugar or use it as a base for other drinks like cappuccino or latte.
The crema fades quickly, so don’t let the shot sit too long. For milk drinks, start steaming milk while the shot is brewing, so you can combine them right away.
7. Clean Up
Knock out the used puck, rinse the portafilter, and wipe the machine’s group head. Regular cleaning keeps your espresso tasting its best.
If you leave old coffee in the portafilter, it can turn rancid and affect your next shot. A quick wipe and rinse after each use is enough for daily cleaning.
Non-obvious insight: Consistency is key. Use the same amount of coffee, water, and timing each time, and change only one variable if you want to improve your shot.
Common Problems And How To Fix Them
Making espresso takes practice. Don’t be discouraged if your first shots aren’t perfect. Here’s how to solve common issues:
- No crema: Beans may be too old, grind too coarse, or water temperature too low.
- Sour taste: Shot is under-extracted. Try a finer grind, more coffee, or longer extraction.
- Bitter taste: Over-extracted. Use a coarser grind, less coffee, or shorter extraction.
- Watery shot: Too little coffee, grind too coarse, or tamping too light.
- Shot too slow: Grind is too fine or tamping too hard.
Other problems:
- Channeling (uneven flow): Grounds not distributed evenly or tamped unevenly. Use a distribution tool or level your tamp.
- Spraying from portafilter: Grounds are too fine, or basket is overfilled. Adjust dose or grind.
- Burnt taste: Machine is too hot or dirty. Let it cool, clean more often, or adjust temperature.
Pro tip: Keep a notebook of your settings (beans, grind size, dose, tamp pressure, time) so you can adjust and improve with each shot. Over time, you’ll see patterns and learn what works for your taste.
Comparing Espresso Machines For Home Use
Choosing the right espresso machine depends on your budget, skill, and how much control you want.
| Model | Type | Ease of Use | Features | Average Price (USD) |
|---|---|---|---|---|
| Breville Barista Express | Semi-automatic | Medium | Built-in grinder, steam wand | 600 |
| Gaggia Classic Pro | Semi-automatic | Medium | Commercial-style group head | 450 |
| De’Longhi Dedica | Semi-automatic | Easy | Compact size, simple controls | 300 |
| Nespresso Pixie | Pod-based | Very easy | Capsule system, fast heat-up | 180 |
| La Pavoni Europiccola | Manual (Lever) | Hard | Full control, classic design | 900 |
Some machines have programmable settings, dual boilers (so you can steam milk and brew at the same time), or pre-infusion features. Consider how often you’ll use it, your kitchen space, and if you want to upgrade in the future.
Non-obvious insight: Machines with built-in grinders save space but may not offer the grind consistency of a standalone burr grinder. If your budget allows, a separate grinder is usually a better investment in the long run.
Manual Vs. Automatic Espresso Preparation
Some people love the ritual of pulling a manual shot, while others prefer the simplicity of pushing a button. Here are the main differences:
- Manual: You control water flow and pressure. This means more skill is needed, but you can fine-tune every variable.
- Semi-automatic: You choose when to start and stop the shot. Good mix of control and convenience.
- Automatic: Machine handles timing and water flow. Less control, but very consistent.
- Pod/capsule: Fast and easy but limited in coffee choice and taste.
Manual machines are rewarding but challenging. Automatic machines make espresso accessible to everyone, but you may lose some of the “craft” and ability to experiment.
For those serious about espresso, a semi-automatic machine is often the best balance. It gives you control but doesn’t overwhelm with complexity.
Non-obvious insight: If you want to experiment with lighter roasts or specialty beans, a semi-automatic or manual machine allows you to adjust variables that pod or automatic machines cannot.
Milk Steaming And Latte Art
If you want to make drinks like lattes or cappuccinos, you’ll need to learn milk steaming.
How To Steam Milk
- Use cold, fresh milk (whole milk creates the best foam).
- Fill your pitcher about one-third full.
- Place the steam wand just below the surface and turn it on.
- Lower the pitcher as the milk expands (“stretching” phase).
- Submerge the wand deeper to heat the milk to 60 -65°C (140 -150°F).
- Tap and swirl the pitcher to remove large bubbles.
- Pour immediately for best texture.
Whole milk is best for creamy foam, but non-dairy options like oat or soy can work if you adjust technique. For best results, use a stainless steel pitcher with a pointed spout.
Non-obvious insight: The sound tells you a lot. If you hear a loud screech, the wand is too close to the surface. A gentle hissing is ideal.
Latte Art Basics
Good microfoam is shiny and smooth. Hold the cup at an angle and pour steadily, starting high and moving closer as you fill. With practice, you can make hearts, rosettas, and more.
Start with simple shapes and move to more complex designs as you improve. Don’t be afraid to practice with water and soap before using real milk.
Pro tip: Always clean the steam wand right after use to avoid milk residue build-up. Purge steam before and after, and wipe with a damp cloth.
Cleaning And Maintenance
A clean machine makes better coffee and lasts longer. Here’s what you should do:
- After every use: Rinse portafilter, group head, and steam wand.
- Daily: Wipe down the exterior and drip tray.
- Weekly: Backflush the machine (if your model allows) with clean water.
- Monthly: Use a descaling solution if you have hard water.
Neglecting cleaning can cause bitter flavors and machine problems. If you notice your espresso tastes off or flow is slow, it’s probably time for a deep clean.
Non-obvious insight: Old coffee oils in your machine can block water flow and ruin flavor, so regular deep cleaning is essential. Using a group head brush and backflush cleaner helps keep everything in top shape.
Espresso Brewing Variables: The Science
Espresso may seem simple, but many variables affect the final shot. Here are the key ones:
- Dose: Amount of ground coffee (in grams)
- Yield: How much espresso you extract (in ml)
- Extraction time: How long water contacts the grounds (in seconds)
- Grind size: Finer for longer extraction, coarser for faster
- Water temperature: Impacts extraction and flavor
- Tamp pressure: Consistent, firm tamp is key
Changing one variable can change your espresso a lot. Most home baristas start with a 1:2 ratio (18g coffee for 36g espresso), but you can adjust to taste.
Non-obvious insight: Humidity in your kitchen can affect grind size. On rainy days, you may need a slightly coarser grind for the same results.
Troubleshooting: Tasting And Adjusting
Learning to taste your espresso helps you improve. Here’s a quick guide:
- Sour/acidic: Increase extraction time, try a finer grind.
- Bitter/burnt: Decrease extraction time, try a coarser grind.
- Thin/watery: Increase coffee dose, check tamp pressure.
- Too strong: Lower dose or increase yield.
- Too weak: Increase dose or lower yield.
Keep your changes small and only adjust one thing at a time. Taste each shot carefully, and don’t be afraid to dump a bad one and try again.
Non-obvious insight: Taste your espresso both when hot and as it cools. Flavors change with temperature; some bitterness or acidity fades after a few minutes.
Espresso-based Drinks You Can Make
With a good espresso base, you can make many classic coffeehouse drinks:
- Americano: Add hot water to espresso for a lighter cup.
- Cappuccino: 1/3 espresso, 1/3 steamed milk, 1/3 milk foam.
- Latte: 1/3 espresso, 2/3 steamed milk, thin layer of foam.
- Macchiato: Espresso “stained” with a small amount of milk foam.
- Flat White: Similar to a latte but with microfoam and less milk.
- Mocha: Espresso with steamed milk and chocolate.
- Affogato: Espresso poured over vanilla ice cream.
Each drink has its own character. Experiment to find your favorite. For example, add a dash of cinnamon to a cappuccino, or try a “dirty chai” by combining espresso with chai tea and steamed milk.
Non-obvious insight: The same espresso shot can taste different in each drink depending on the milk-to-coffee ratio. Adjust your espresso strength to suit your preferred beverage.
The Cost Of Making Espresso At Home
Espresso at home can save money over time. Here’s a rough cost breakdown for a typical setup:
- Espresso machine: $300 -$1,000+
- Grinder: $100 -$400
- Accessories (tamper, scale, pitcher): $50 -$150
- Beans: $15 -$30 per pound (makes ~20 -30 double shots)
The upfront investment is higher than drip coffee, but you’ll pay less per cup compared to buying from a café. On average, a homemade double shot may cost $0. 50 -$0. 80, compared to $3 -$5 at a coffee shop.
Non-obvious insight: Maintenance and cleaning supplies (like descaling solution) add small ongoing costs, but regular care extends machine life, saving you money in the long run.
How To Improve Your Skills
Making great espresso is a journey. Here are some ways to get better:
- Join online communities: Forums like Home-Barista and Reddit’s r/espresso offer advice.
- Take notes: Record your recipes, times, and results.
- Try different beans and roasts: See how they change your shot.
- Watch barista tutorials: Many pro baristas share tips on YouTube.
- Taste with intention: Focus on what you like and what you want to improve.
Practice is key. Try blind-tasting shots with friends or family and discuss differences. Attend local coffee classes if available.
Non-obvious insight: Many home baristas improve fastest by inviting feedback from others, or by volunteering to make drinks for guests and noting their reactions.
Myths And Misconceptions About Home Espresso
Many people believe making espresso at home is hard or requires expensive gear. Here are some myths:
- Myth: You need a $2,000 machine for good espresso.
- Truth: Entry-level machines can make excellent shots if you use fresh beans and a good grinder.
- Myth: Espresso is always dark and bitter.
- Truth: Light and medium roasts can make sweet, bright espresso.
- Myth: Pod machines make true espresso.
- Truth: Pod machines make a similar drink, but it usually lacks the crema and depth of real espresso.
- Myth: Only Italians can make good espresso.
- Truth: Anyone can learn with practice and care.
- Myth: Steaming milk is too difficult for home use.
- Truth: With practice and the right pitcher, home steamed milk can rival your favorite café.
Advanced Tips For Serious Home Baristas
If you want to go further, consider these techniques:
- Pre-infusion: Some machines let you pre-wet the grounds before full pressure. This helps even extraction.
- Pressure profiling: Adjusting pressure during extraction can change flavor. Some high-end machines offer this.
- Water recipe: For best taste, use water with balanced minerals. You can buy mineral packets or make your own.
- Upgrading your tamper: A heavy, flat tamper can improve consistency.
Use a bottomless portafilter to watch extraction and spot channeling (uneven flow). This visual feedback speeds up learning.
Pro tip: Always taste your espresso plain before adding milk or sugar. This helps you understand the flavor of your shot.
Sustainability And Ethical Considerations
Great espresso starts with responsible choices. Look for beans that are Fair Trade, Rainforest Alliance, or Direct Trade certified. These ensure farmers are paid fairly and the environment is protected.
Compost your used coffee grounds or use them in your garden. Choose machines and accessories that last, not ones that end up in a landfill.
Non-obvious insight: Some local farms or community gardens will gladly accept your used coffee grounds, as they enrich compost and soil.
If you use a pod machine, look for brands that offer recyclable or compostable capsules to reduce waste.
Espresso Vs. Other Coffee Brewing Methods
Espresso isn’t the only way to make coffee. Here’s a quick comparison:
| Method | Strength | Brewing Time | Grind Size | Texture |
|---|---|---|---|---|
| Espresso | Very strong | 25 -35 sec | Fine | Thick, creamy |
| Drip coffee | Medium | 4 -6 min | Medium | Clean, smooth |
| French press | Strong | 4 min | Coarse | Full-bodied |
| AeroPress | Medium-strong | 1 -2 min | Fine-medium | Versatile |
| Moka pot | Strong | 5 min | Fine | Rich, less crema |
Each method has its fans, but only espresso creates the intense shot with crema that’s the base for many café drinks.
Non-obvious insight: Moka pot and AeroPress can give you a taste of espresso, but the pressure is much lower. They’re great for travel or as a backup when you don’t want to use your main machine.
Learning Resources And Where To Go Next
If you want to dive deeper, check out barista training videos, online forums, or books like “The Blue Bottle Craft of Coffee.” For technical details about espresso standards, the Wikipedia Espresso page is also helpful.
There are also local barista courses and coffee tasting events if you want hands-on practice.
Non-obvious insight: Many specialty coffee shops offer “espresso labs” or “tasting flights” where you can compare different beans and methods side by side. This is a fun way to expand your palate.
Frequently Asked Questions
What Is The Ideal Grind Size For Espresso?
Espresso needs a fine grind, similar to table salt. Too coarse and your shot will be weak; too fine and it will be bitter or slow. Adjust the grind slightly each time you change beans or notice a difference in extraction.
Can I Make Espresso Without A Machine?
You can use a Moka pot or AeroPress with a metal filter, but the result will be close to, but not exactly, true espresso. You won’t get the same crema or pressure.
How Important Is Tamping Pressure?
Tamping is critical. Consistent, even pressure ensures water flows evenly through the grounds. Around 30 pounds (13.6 kg) is typical, but consistency matters more than exact force. Try tamping on a bathroom scale to feel what 30 pounds is like.
Why Does My Espresso Taste Sour Or Bitter?
Sour espresso usually means it’s under-extracted (too quick, grind too coarse). Bitter means over-extracted (too slow, grind too fine). Adjust one variable at a time and retest.
How Do I Clean My Espresso Machine?
Rinse the portafilter and group head after every use. Backflush weekly (if your machine allows), and descale monthly with a special solution, especially if you use hard water.
Non-obvious insight: Use a water filter jug if your tap water is hard; it protects your machine and makes cleaning easier.
—
Making espresso at home is a rewarding hobby that blends art, science, and daily enjoyment. With practice and patience, you’ll be able to impress friends and enjoy the best coffee anytime -no café required. The journey doesn’t end with your first good shot.
The world of espresso is always growing, and there’s always something new to learn, taste, and share.